 Back to Diploma Thesis Page
 |
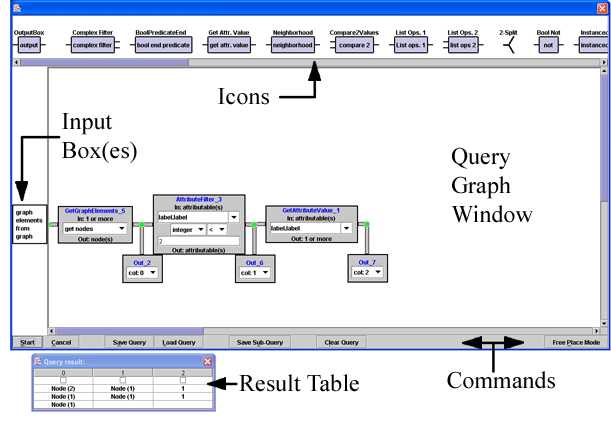
Output_Box will be located to the very left, followed by all basic boxes. Separated by a larger gap the compound boxes like the AttributeFilter_Box and SizeOf_Box can be found. The last icons (after having scrolled the icon panel to the very right) belong to boxes that extend the system beyond a simple query language: ChangeAttribute_Box and Algorithm_Box. The largest part of the dialog is covered by an empty space. This is called the main panel. In this panel, the query will be created.The "Cancel" button in the bottom left corner closes the window (the current query is lost if it has not been explicitly saved).
Green and red filled circles (marks) indicate whether two boxes (and maybe an additional Output_Box) are correctly connected or not.
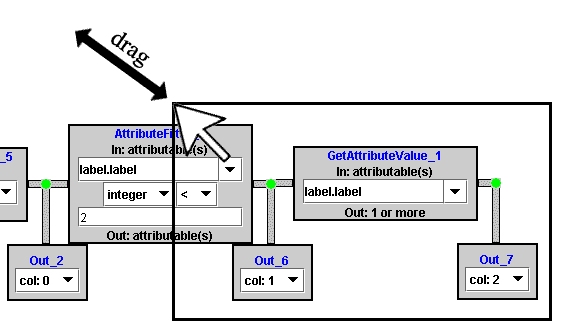
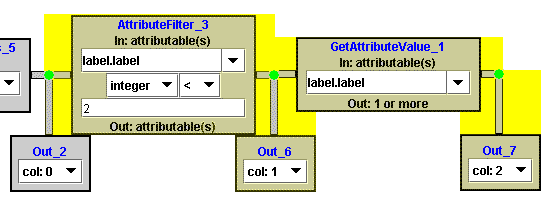
To remove a box from the main panel, simple double click on it. To remove several boxes in one step, draw a selection rectangle around those boxes and double click on one of the marked ones. This can be done by pressing and holding the left mouse button at some free place in the main panel (i.e. where no box is located). Drag the mouse over the boxes that should be marked and release the button. A rectangle is drawn indicating the area that will be selected. Only boxes that are located entirely inside the selection rectangle are marked.
|
AttributeFilter_Box, this results in the following boxes being marked:
|
The parameters of boxes can intuitively be changed using the corresponding components inside the box representations.
The button labelled "Clear Query" can be used to remove all boxes from the main panel.
Sometimes it is useful to move a box representation some distance without it being automatically snapped to the next free input / output. This can be achieved by activating the free place mode by clicking on the "Free Place Mode" button located in the bottom right corner. This deactivates the automatic placement of boxes as long as the mode is not deactivated by clicking on the button again.
|
Clicking anywhere but on a selected box removes an active selection.
Whenever two boxes should be connected that cannot be dragged towards each other, OneOneConnector_Boxes can be used. There is no explicit icon in the icon panel for this box. Clicking on any red mark (not belonging to a OneOneConnector_Box) starts a OneOneConnector_Box. If free place mode is not switched on, the other end of the connector will probably snap to the next free input / output at once.
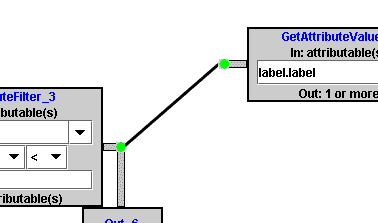
|
The button "Save Sub-Query" is responsible for saving only the selected part of the query. The second difference to the normal "Save Query" button is that additional information is stored. The purpose of this feature is to save subqueries that will later be loaded into a SubQuery_Box. When selecting several boxes, all free inputs and all Output_Boxes are tagged with i1, i2, ... and o1, o2, ... respectively. This information will be saved together with the subquery since it fixes the order in which the inputs and outputs of the SubQuery_Box getting this subquery as parameter will appear. The tags are sorted by the vertical (i.e. y-) coordinates of the inputs / outputs.
Principally, it is possible to load a query into a SubQuery_Box that has not been saved via the "Save Sub-Query" button. This means, however, that the order of the inputs and outputs is chosen by random and can change when loading the same query several times.
Loading a query using the "Load Query" button opens a file chooser dialog. If a file has been chosen and the contained query graph can successfully be loaded, the current query will be removed from the main panel and the new graph is added.
Saved queries can also be loaded into the Gravisto system. Since the names of the boxes and their geometrical properties are saved as normal attributes, the standard Gravisto view will display a readable version of it. No functionality is connected to those node, of course.

|
Whenever a query has been successfully executed, another small dialog pops up, showing the result table of the current query. This is connected to the Gravisto editor in the following way: Selecting any cell in the table results in all graph elements that are displayed in this cell (maybe nested within collections of collections) being marked in the Gravisto view. The checkbox on top of each column in the result table can be used to select all cells in one column. Observe that the very moment a cell containing a graph element has been selected, the second standard input box appears.